
Starting a podcast in 2020 is a lot easier than it was a couple of years ago. Equipment is easier to use and cheaper to come by. However, that’s not to say that there aren’t a couple of learning curves when it comes to starting a podcast.
Although the field may be less crowded than the blogging sphere, there are over 800,000 podcast shows and will soon be in the millions. If you are going to start a podcast in 2020 you’ll need to up your game to be noticed even with a captive audience.
This guide will help walk you through the process of where to start in 2020, recording and preparing your podcast, where to host your podcast, how to prepare to submit your podcast to iTunes, and what to do after. If you have questions like:
- What topic should I pick?
- Can I speak about something even if I’m not an expert?
- How can I edit my podcast? Is there free software available?
- Do I need a website or an audio host?
- Where do I buy podcast cover art for cheap?
- Which website hosting platform should I choose?
- How do I record multiple people for cheap?
- What piece of equipment is the most important?
- What type of microphone is best for my situation?
- How can I market my podcast?
Then we have the guide for you. If you already have some parts of this down, feel free to skip to the section you need.
Note: This article includes affiliate links. If you decide to purchase something, we may make a small commision at no additional cost to you.
Contents:
- Recording and preparing your podcast for launch
- Recording alone versus together
- Mics dynamic vs. condenser mic, cheap vs. expensive
- Dynamic Mics under $100
- Dynamic Mics over $100
- Condenser Mics under $100
- Condenser Mics over $100
- Voice Recorders
- Mixer
- Audio interface
- Recording software
- Boom arm or desk stand
- Headphones
- Amplifiers
- Pop filter
- Recording your first episode
Where to Start
Starting a podcast can be daunting, but it doesn’t have to be. You can launch a podcast for your business or as a hobby. You should know that the average podcast takes time to build an audience. Getting these basic things down can help you grow in your niche and clearly define your target audience.
It’s time to mix your creative side with the marketing side.
Defining Topic and Niche
If you don’t have a topic or niche, but still want to start a podcast, here are some key questions to help you pick a topic.
- What are your interests?
- Is this just a hobby or do you want to eventually start a business with this podcast?
- Which interest of yours would you like to further explore? Do you want to become an expert in that interest or a casual observer?
- Do you want your podcasting to be dependent on a product or service? For example, movie reviews or political news? Going down this route may mean that your content needs to be extremely relevant or target specific niches. Meaning you’ll have to keep up with timely movies and news or be very specific in who you cover. For example, you only review horror films from the 1960s or your podcast is over the rise and end of the Vietnam War covering multiple angles. The downsides of covering relevant reviews or movies is that you are always dependent on content from other sources and that content can be worthwhile or not.
- Do you want your topic to have clearly definable facts to base itself off of? For example, a Supreme Court ruling. This is different than talking about a topic like Buddhism vs. Christianity. This is also different than talking about personal taste, i.e. ranking the albums of a classic rock band. These decisions all affect workload as you’ll need to gather more information and establish yourself as trustworthy to your audience.
- Try brainstorming ideas that you are interested in using brainstorming techniques.
- Think about your ideal audience, what would they like to watch?
- How can you expand your topic in different ways? Can you think of multiple ways to explore your topic?
- If you were to write down episode ideas, how many can you come up within a single sitting?
- Some podcasts don’t have specific topics, and act as a stream of consciousness of the podcaster and guests. What about your perspective can you make fresh for your audience? Can you come up with an engaging format that makes the audience feel part of the “in-crowd” on your inside jokes?
- Also, consider how you will be able to give yourself breaks. One of the fastest ways to kill a podcast is to burn out.
Using these questions and statements can help you narrow down your search on what to talk about. Most importantly though, your topic should be fun to discuss for multiple hours! That doesn’t mean your podcast should be multiple hours long.
Rather, you are going to be talking about this subject multiple times throughout the year. Make sure you have a lot of passion for your topic.
Finding out your target audience for a creative endeavor is also helpful for narrowing down your content. This will help you not only define your topic and niche, but also who to market your podcast to. Ask yourself these questions in defining them:
- What questions can I answer with my podcast?
- Is my audience looking for a nuanced opinion or to be informed? Does my show format help me present that information in a new way?
- Are they looking for something to make them laugh?
- What does the competition do and how can I do better?
- How old is my target audience?
- What is their income?
- Do they have a lot of time on their hands to listen?
- Is my content gender-specific or neutral?
- What stage of life are they in?
If you are planning to talk about hot button issues, but are biased or not necessarily an expert (such as politics, or new areas of science), it’s best to be upfront about those shortcomings. This shows that you are willing to grow with your audience and that you are an honest person.
It can help establish a connection with your audience.
Another way to gain credibility with your audience is to invite experts on to empathize with your points or provide a counter-argument. It establishes that you are willing to hear other people out. More importantly, you show that your podcast is open to reform and learning, which may very well lead to you becoming an expert in your field.
While no one can guarantee success, it’s important to be authentic with your audience. Even then, some people can still dislike your content based on nothing you can control.
Workload and Planning
It can be tempting to think about having a podcast that reaches three hours long, but the honest truth is that you aren’t Joe Rogan. Oftentimes, new podcasters take on too much of a workload and burn out.
You need to figure out a system that works for your lifestyle. Podcast length varies wildly and fans engage in different ways.
At first, shoot for a podcast that will be no more than an hour long. Why? Most likely, recording will be the fun and easy part. Editing and research, however, all add extra time to that workload. Not only do you have to learn all new skills, but a tedious workload can kill your passion quickly.
It can be time-consuming to skim through a three-hour podcast, especially if you are new to audio editing.
Also, if you are launching a podcast, a longer episode is a big ask of the audience. Essentially, if you don’t have the name recognition, audiences are less likely to give you three hours to prove yourself. That doesn’t mean you can’t have a longer podcast; you may just want to make it easier on yourself and the listener early on while building a following.
Once you start seeing consistent downloads, ask your fans if they would like more content. Ask them how they would like to receive that content. You might be surprised to find that some wouldn’t mind reading a blog post from you instead of more audio content.
Fans will also be upfront about wanting more content!
In addition, it’s a good idea to come up with episodes beforehand. Before ever recording, try writing out at least 30 ideas for episodes. You need to make sure that you can consistently come up with ideas for your podcast.
Planning is going to be one of your best tools for having a successful podcast, even as you grow in subscriber count.
Once you start to release the last 10 episodes, start planning out the next thirty. Get a calendar and figure out how often you will like to release it. Once a week? Twice a week? The average for an hour-long podcast starting out ranges from once every week to once every two weeks.
What matters most is not quantity, although having multiple episodes is only going to help you get noticed. It’s quality. Don’t pump out content just because you can. Instead, find a creative workflow that allows you to produce quality content.
Setting clear expectations on how and when your show can be consumed helps you build a consistent following as well. If you plan on releasing every Tuesday, make sure to state that on your podcast, website, social media, and other platforms.
Consistency to your audience helps inundate you into their routine.
Consider Batching Episodes
On the topic of planning your podcast, consider how you can batch producing podcasts in one day. In layman’s terms, see if you can record multiple episodes in one day. The shorter your podcast, the easier it will be. It’s also a good idea to always be a couple of episodes ahead. That way, should life come up, and it inevitably will, you can pull from your back catalog.
Additionally, this can help you take breaks and make adjustments in between producing content. This is key to preventing burn out and content fatigue.
This is where that calendar comes in. Scheduling out a month’s or more worth of podcasts helps you stay on top of everything. It is easier to plan out recording sessions, editing, interviews, and marketing strategies. It allows you to invest your time in other projects more effectively.
Podcast Length
We’ve mentioned podcast length here multiple times, but that’s because we believe it matters greatly. Each podcast audience is different, although there is some overlap. One facet that needs to be stressed is about how length affects your ability to communicate. For example, if you are a pop-science podcast, limiting your podcast to 30 minutes a week can make your content more easily accessible.
However, does it mean that you are effectively communicating what you are trying to explain to your audience? Are you doing your topic a disservice by limiting yourself in this way?
Always try to find this balance when dealing with factual information.
Also, there is a tendency in newer podcasters to leave moments of pausing or long moments of silence in your podcast. This is likely due to unfamiliarity in editing techniques. Even if your podcast is you sitting around with friends drinking beer talking about funny stories, you want to keep that conversation flowing. Think about your everyday conversations.
Most of the time humans almost cut each other off trying to respond. Your podcast should have that feeling as well. The best way to mitigate pauses during your podcast, without editing, is again to plan your shows out.
Have a road map of where you are going.
Finally, remember that you don’t want to overload your plate and kill your passions. Take breaks and don’t try to run before you walk.
Podcast Format
There are several formats to choose from when you start a podcast. The common methods are:
- Single monologue/stream of consciousness
- Roundtable conversationalist with one or multiple hosts
- Interview podcast in which you interview a person for the whole podcast
- Reverse interview podcast where a “host” interviews you in each episode as the expert on specific topics.
- A panel discussion, you invite multiple experts on to talk about a specific topic
- Fictional podcasts usually involving high-quality production and a cast of voice actors; however, not always
- Nonfiction informative podcast
- Something entirely different!
Picking the right one for you can be tricky. Basically, the format you choose should play to your strengths.
Have good research skills and get to know people easily? An interview type may benefit you the best.
Do you love arguing or processing a topic in real-time?
Are you the type of person to watch an hour-long discussion over star Wars theories? Then a conversationalist podcast may be correct for you.
Love being creative and have a knack for writing and acting? Then a fictional podcast may be right for you. When podcasting, your format should help you “get in the zone.” After a few episodes, it should feel natural to you.
Remember, these are the base formats for podcasting shows. You don’t have to follow the formula that everyone else does. In fact, it is best that you don’t just copy other show formats. It needs to be unique and bring a fresh perspective on that format to really stand out.
Start a podcast in 2020 that changes the game, or adds a unique way of telling the same story.
Castos has a more in-depth article that breaks down the pros and cons of each format. Make sure to check them out if you are having trouble choosing a format.
Sidenote: Having guests on your podcast, whether for an interview or not, can be a great way to boost and start a podcast in 2020. Invite people on that can share your podcast to a large audience. It doesn’t have to be someone famous, just someone who will recommend your episodes.
Do you need a partner and what should they be like?
Having a partner with your podcast can do several things for you. It can:
- Lighten the research, editing, recording, and marketing workload
- Be a source of inspiration and ideas
- Help connect you to people to interview or share your podcast
- Be a fun person to talk with
- Give you someone to bounce ideas off of
- Help manage stress
- Specialize in a specific area of the podcast so you can focus on things that interest you
- Help create an interesting dialogue on your podcast
- Provide expertise
- Add diversity to your podcast
When looking for a podcasting co-host, ask yourself the following question:
- How will a co-host help me provide and prepare better content?
- How committed to the podcast are they? Do they have the same goals as me?
- In what ways can they promote the show?
- Do they have any skills that will enhance production?
- What other obligations do they have and will it affect our show?
Most podcasts do have a co-host or partner dynamic of some kind. If you elect to invite someone to be your co-host, there are a couple of things you need to establish early on with them.
You need to establish upfront and clearly the workload that is expected from each participant. Write it out on a sheet of paper and add to it when necessary. That way, you and your co-host will be accountable.
Second, you need to make sure that you and your partner have chemistry while recording. Sometimes, when people are being recorded on camera or through a microphone they feel uncomfortable. Try recording a couple of practice sessions together to make sure you have good chemistry.
Third, promoting is also another important factor in picking a partner. It’s not just about audience size. Rather, are they committed to sharing the podcast on social media and with people.
Fourth, communication of problems is key to not disrupting a podcast. Whenever humans make creative works of art, we tend to become personally attached to them.
Your co-host needs to be able to give you criticism and be able to receive constructive criticism as well. Having that open dialogue will help you work out the kinks of your show early, and help you grow in the future.
Fifth, write down the goals you want to achieve with this podcast. Are you looking to make money? Is this just a hobby? Are you trying to launch a business? What is everyone involved willing to sacrifice to meet that end goal?
Discuss at length with your future co-host. There should be no mistaking what the ultimate form of the show is and how you want to accomplish it. In fact, having this discussion can lead you to make decisions that change the format of the show to suit everyone’s needs.
If you want to know more about the topic watch this guide here:
Naming Your Podcast
Naming your podcast is essentially one of your biggest opportunities for branding. It can make someone give your show a chance, even though we shouldn’t judge a book by its cover.
It should be simple, to the point, help people discover you, and reveal a theme from your show. There are basically two schools of thought when it comes to naming your podcast.
Option #1: Your name is specific to your content
Naming your podcast something that is specific to your topic can help when people search you on their podcasting app. It can also help you with SEO purposes with your website. Your name may also say something like a specific name. The title often helps clue the listener into what the podcast is going to be about or what to expect. Examples include:
- The Joe Rogan Experience
- The NPR Politics Podcast
- MuggleCast
- How to Be American
- Crime Junkie
- Park Predators
- Strong Opinion Sports
With just about every one of those podcasts you can guess what they are talking about. Or you can recognize them by their specific language (muggle comes from the Harry Potter series and is an easily recognizable term in that niche). They clearly state what the show is about or who is involved.
Options #2: Your podcast name is funny or is a play on words or society. This can be an eye-catching approach and shows part of your podcast’s personality. It often feels fun to say or repeat to the others. These should be clever names and they would almost certainly fit on a graphic t-shirt.
Oftentimes, people who already have platforms use this type of approach. People who do not have a platform typically use option #1 as it can be easier to gain followers from natural SEO searches. Names include:
- Pod Save America
- Pardon My Take
- Armchair Expert
- Code Switch
- Against the Rule
- This Podcast Will Kill You
- The Moth
- Welcome to Night Vale
If you were to hear any of those names on the street you probably wouldn’t be able to guess what they are actually about. However, they can be great branding tools for selling products such as coffee mugs, t-shirt, jackets, etc. For those that listen they are “in on the joke.”
Again, this is a viable option for anyone, but the SEO will be harder to come by.
Also, try coming up with your name after recording a practice episode or two. Your topic and format may inspire a unique name.
Warning: Before picking a name, check to see that it is not already taken on iTunes, website domains, and social media platforms. That way you won’t have to compete with someone else and you can craft your own branding.
It’s much harder for your fans to find you if all of your social media platforms and website have variations of your podcast name rather than a succinct name across all platforms.
Write Show Notes
Writing show notes from the beginning is going to help you start a podcast that is more developed and less distracted. It’s your bread and butter if you have very little public speaking.
For your personal use, draft an outline of the entire episode of the podcast. You don’t have to write out every word you plan on stating, but draft the general point of discussion you would like to hit in an episode. It will give you a road map to keep the conversation going.
Also, write down other topics that tie into your subject matter or points of interest. This can help you increase the run time of your podcast, without it feeling like you’re wasting the time of your listener.
On the flip side, show notes can be even better for your audience. When you post a podcast episode, in the show notes you can include:
- Timestamps of different topics discussed
- SEO keyphrases
- Relevant research and information on the topic
- Call-To-Action for the listener, whether to buy a product, subscribe or sign up for an email list.
- Ways to be contacted via social media or website
You can include show notes like these each time you upload, or link to a blog post with the show notes. It can be an extra step in the uploading process, but it can make it easier for listeners to access more content and information.
To really make your show notes come alive, use key phrases and terms surrounding your topics. As Castos points out on their website for good SEO tactics:
“This means every page should target a specific keyword. The keyword should appear in these key locations:
Your page title (the <title> tag)
The page’s URL. As close to the domain as possible.
The main heading (the <h1>)
A few subheadings (<h2>, <h3>, etc.)
The first 100 words of text on the page.
The last 100 words of text on the page.
Sprinkled throughout the copy in reasonable places.
Your image ALT attributes.”
If this seems like too much when starting out, don’t worry. Simple show notes such as timestamps and listing your website are great ways to connect with fans. It makes consuming your content easier and more accessible, which is what you always want. It’s not that they need to listen to every word you say on a podcast, but rather, that they keep coming back.
There is also the idea of writing transcriptions of your podcasts on your website. Now, this is tedious and time-consuming, but it will add lots of content to your website fast.
However, not everyone has the time to transcribe their own episode. If you want to still transcribe your podcasts, consider hiring transcription services to help cut down on your workload. Again, this level of show notes isn’t necessary and can be avoided if you are starting out. You should focus solely on the content when you start a podcast in 2020.
Picking Intro and Outro Music
Introduction music and Outro music out aren’t absolutely required for your podcast, but just about every podcast uses some type of jingle.
Why not upgrade your production value with some free music?
Here are some royalty-free options to choose from. If you are looking for an all-inclusive list, check out Podcasting Insights.
Pixabay Music: Pixabay Music is totally free music ranging in genres. All they ask is that you provide a link on your website or show notes linking back to the site. If you are looking for some static music to play every episode, this may be the site for you. Pixabay has full songs and short background pieces you can use in your production. Pixabay also houses thousands of free photos so you can use them for blog posts, or posts on social media. It’s a great site that doesn’t cost you anything. Above all, link back to them and share the love!
Incompetech: You’ll find high-quality sounds on this site. The best part is you can either credit the artist and use the song for free or buy a license to use the song outright. To give credit, simply say the production credits at the end of your episode.
Audionautix: Free music, even for commercial purposes, so long as you credit the author of the song. This site has a wide selection to choose from, including simple clips to full-on productions.
Freepd: All of these songs are in public domain and can be used for just about any project. Although it is not required, it is greatly appreciated when you credit their work as it helps spread the message and goal of the website.
Free Music Archive: FMA, for short, provides highly curated songs through their website. Songs have different licensing agreements so you must be careful when selecting songs. Some require written permission, and others state that you cannot use the song for commercial purposes.
You haven’t hit record yet; heck, we haven’t even talked about microphones yet, so why are we mentioning music?
The reason to mention music so early in the development of your podcast is that music is a powerful tool. It can set the tone for your podcast, induce dramatic flair, provide ambiance, and bring forth powerful emotions.
Take a look at some of these examples and notice how the music, sound effects, and placement of silence affect your viewing experience.
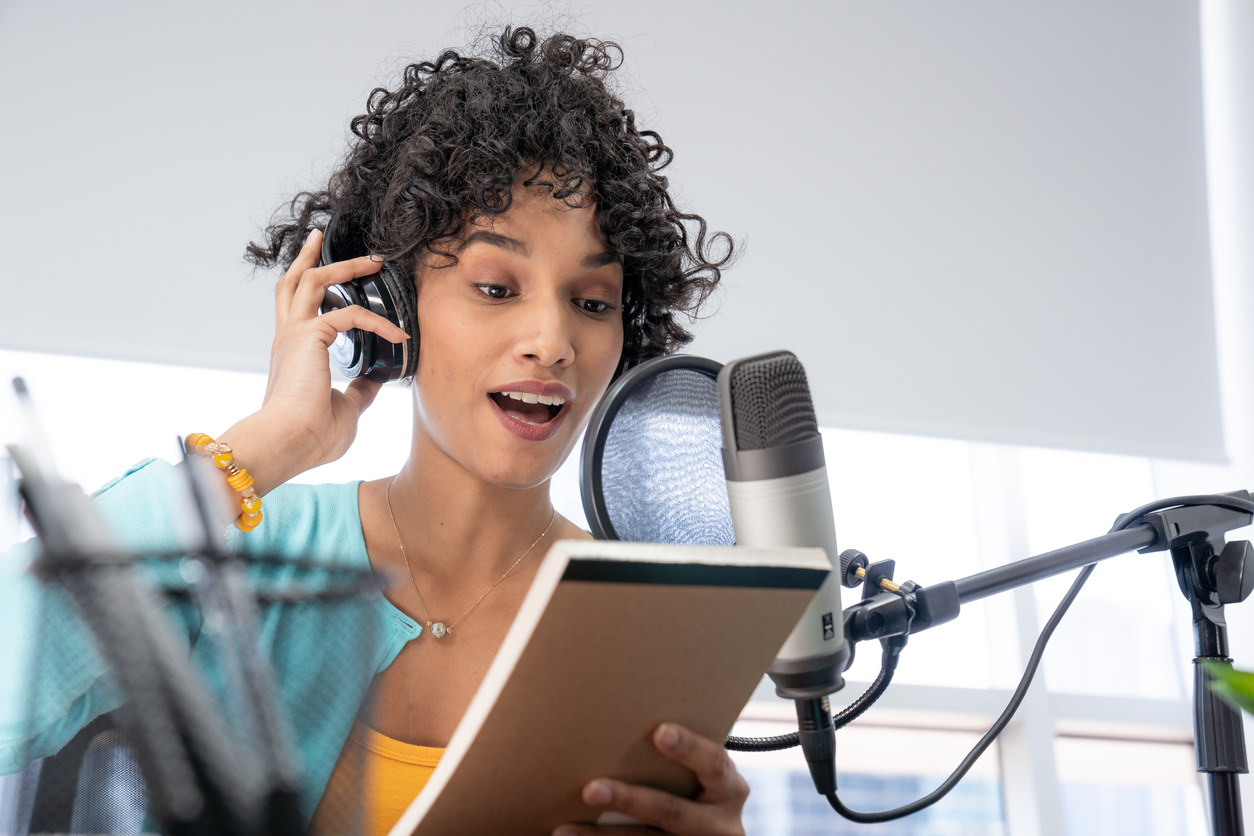
Recording and Preparing Your Podcast for Launch
So you’ve narrowed down your topic, figured out your niche audience, and have a format for your podcast.
Great! Now it’s time to get to recording.
If you never have tried to record a podcast or worked with microphones, you DO NOT need to spend hundreds of dollars on a microphone. Quite frankly, you need to keep your investment low as a first-timer.
There is a very real possibility you don’t have the right set-up for an expensive microphone and you may always quit podcasting. If that happens, you’re stuck with a $300 dollar paperweight that isn’t benefiting you any. This list does have some more expensive options, but those items are recommended mostly for pros and those with cash to spend.
However, that’s not all the equipment you’ll need to record a podcast. Here are some common items you may need for a podcast:
- Computer
- Recording Software
- Microphone
- Pop Filter
- Boom Arm
- Isolation Box
- Headphones
- Audio Interface
- Mixer
Some of these items are optional or not necessary depending on your set-up. When starting out, try to keep your set significantly smaller and easy to operate. The last thing you want is to have a very technical process of recording as that can kill your enthusiasm for an episode.
Imagine landing an interview with a famous physics professor to talk about a subject that is highly specific. He’s a world-renowned scientist and is one of the top in his field. You have to meet him in his office and he has about an hour log gap in-between classes for this interview.
You’re giddy, excited, and elated at the prospect of talking with this professor. Not only is he an idol of your passion project, but he’s also lending legitimacy to your program. You know your listeners know about this person and you’ve mentioned their work several times.
Now, imagine you arrive on time carrying several pounds of gear by yourself. You start the set-up process, which takes 15 minutes, you’ve now limited your content of the interview to 45 minutes. However, you spend 5 minutes introducing yourself. He tells you he needs at least 10 minutes to make it to his class on time. Now, you have only 30 minutes for an interview.
What could have been an hour-long discussion quickly turned into a 30-minute discussion about the highlights of your topic, not the nuanced opinions of the scientific community? What if you could have those extra 15 minutes back?
If you aren’t a professional, choose functionality when selecting equipment. Always account for the setup time when conducting a podcast.
Recording alone vs. Together with someone
When you start a podcast by yourself it can be fairly simple. However, adding people into your podcast becomes a bit tricky. Location, equipment, and time frames all play a factor in how you record your podcast. Keep that in mind when picking equipment. We’ll get to options on how to record multiple people for cheap and how to still have good audio.
First, let’s break down the different types of microphones.
Microphones: Dynamic vs. Condenser, Cheap vs. Expensive
XLR Microphone: uses an XLR to plug into a mixer, amplifier, audio interface, or another recording. Usually used in live settings and gives the best sound quality. There are some XLR to USB cables that you can use, but to get the best quality for an XLR mic you should plug them into an XLR port.
USB Microphone: a microphone that uses a USB cable to plug into a computer and record. Most work with just about every computer and are simple to set up. This is what your average podcaster may use.
Fairly cheap USB mics can produce a high-quality recording. Some microphones come with both options, which can make your life a whole lot easier when upgrading your gear.
There are two types of microphones: dynamic mics, and condenser mics. They work in different ways and are unique for certain types of recordings.
Yet, for anyone starting out, a dynamic microphone is going to be your best solution for good quality sound that is easy to edit.
Also, voice recorders can be used to record a podcast for specific purposes.
Dynamic microphones: Dynamic mics do not require phantom power (a separate, additional power source) to operate, and are considered best for loud sounds right in front of them. They are used often for live venues because they can block out most background noises. They come in both USB and XLR formats.
Why we highly recommend dynamic microphones is because most people will not have a recording booth they can use. Their home won’t be treated for acoustic or any soundproofing. Dynamic microphones isolate your voice and block out background noises.
That means living with neighbors, next to a busy street, or wanting high-quality voice production is in reach for podcasters. It won’t block everything out, but it will significantly improve your audio quality.
Condenser microphones: Condenser mics require phantom power to operate, come in USB and XLR formats, and can provide better sound quality for the money. You should know that by sound quality, we mean it can pick up higher and lower frequencies. It also has a bigger capture diaphragm, which will pick up almost any noise within a certain area.
Condenser mics are for the pros.
Those who can dedicate a space to recording and have experience working with audio software. You can get some truly amazing sounding podcasts using a condenser microphone, but it comes at a cost. It’s why most radio stations use dynamic microphones, but music studios use condenser microphones.
If you are looking to capture every sound of a guitar and start a podcast in 2020 this would be the option for you.
Consider a condenser microphone if you plan on doing some music recording as well
Voice Recorders: Voice recorders are small recording devices that you can take on the go. Remember that scenario we brought up earlier? A voice recorder could have immensely cut back on your set-up time. Voice recorders are best used by podcasters who are on the go often and don’t mind some background noise or want that background noise.
They come in all different price ranges and can even provide XLR outputs for personal dynamic mics. Some also have noise gate features that can reduce unwanted background noises.
Usually, voice recorders require batteries to operate and an SD card to store memory on. The SD card usually has varying levels of memory, so you can upgrade your storage as you need it.
You then would transfer your audio file to your computer for editing and uploading. Professional voice recorders are miles better than the recorder on your phone.don’t make the mistake thinking they are the same.
Other helpful tidbits of information:
Your microphone should have a place where you can input a set of headphones. That way, you can hear your recording in real-time. A microphone that has both USB and XLR combinations helps future proof your set-up. If you want to record multiple USB microphones you won’t be able to record them as separate tracks.
In fact, recording with multiple USB microphones on the same computer can be difficult and usually requires additional software to run properly. Your computer won’t be able to recognize both USB microphone inputs.
Cardioid pickup pattern: refers to a microphone that records directly in front of them.
Omnidirectional pickup pattern: refers to a microphone that will capture all sound surrounding the microphone.
Stereo pickup pattern: Records on the sides of the microphone. Each side is like it’s own track of sound.
Figure 8 pickup pattern: This usually means that the microphone records what is in front of and behind the microphone. It doesn’t mean that it won’t pick up noises to its sides, but that it will be greatly diminished.
Another important side note:
Microphones are weird and some of your favorite songs have been recorded on some of these mics. What works for you may not work for everyone.
Dynamic Microphones Under $100
USB Mics:
Professional Handheld CAD U1 around $25: If you are looking for a lot of bang for your buck, the CAD U1 is the mic for you. It’s made of tough plastics and can give good sound quality for cheap. The important thing to note is that this would be good for a podcast set-up at home. You wouldn’t want to travel with this microphone often. If you want a microphone for the lowest price, this is your best bet.
Samson Q2U around $70: The same Q2U is the go-to recommendation for those looking to start a podcast. It has a USB and XLR port, a headphone jack, great sound, and is easy to record with. This microphone will help block out background noises and other noisy elements. For the price, it can’t be beaten and is future proof for when you want to add an audio interface or mixer into your set-up. It also comes with a desk stand, so you’re ready to start recording right out of the box.
Audio-Technica ATR2100x-USB (ATR Series) around $99: Audio-Technica is known worldwide as a leading microphone and all things audio maker. This microphone gives you USB/XLR ports, a headphone jack, a stand, and more. It’s a lot like the Samson Q2U, although some prefer the sound quality of the Audio-Technica more. Usually, you can find this microphone for around $80 when it is on sale.
XLR Mics:
Behringer Ultravoice Xm8500 around $25: Behringer makes some pretty rugged microphones, and are known across the industry. You can use this microphone for a home studio or live production with the right set-up. It’s cheap and will get the job done, although it doesn’t come with flair.
Shure SM58 around $85: If your podcasting set-up uses XLR microphones then the Shure SM58 should be your go-to mic. The SM58 is used all across the world and is typically found at music studios, rock concerts, music festivals, live podcasts, and so much more. If you want high-quality sound at an affordable price, this is the microphone for you.
Dynamic Microphones Over $100
USB Mics:
Rode Podcaster Microphone USB around $230: If you are looking for a top-of-the-ine microphone for your computer podcasting set up, then look no further than the Rode Microphone. You will get the highest quality mic that can “plug and play.” It has a headphone jack and is compatible with both Windows and Mac (as are all other microphones mentioned.) This microphone won’t future proof your set-up, but is the best when it comes to USB dynamic mics.
XLR Mics:
MXL BCD-1 around $140: The MXL BCD-1 has the build quality of a professional microphone while keeping the price just over $100. It comes with an internal shock mount, and pop filter to reduce plosives and background noise while moving. If you want a microphone that looks and feels professional without having to pay a higher premium price, the MXL BCD-1 may be your best bet. However, look up some tests between this microphone and the Shure SM58. The difference may not be worth the additional price.
Rode Procaster Microphone $230: Just like the Podcaster, the Procaster is a top-of-the-line microphone that is worth every penny. You get all the same features as the Podcast, except in an XLR form. Unlike the Podcaster, the Procaster is future proof should you add more guests.
HEiL PR-40 around $330: Yes, the price is expensive for a microphone. However, the HEiL PR-40 is one of the best mics on the planet. It is used by radio hosts, podcasters, musicians, hobbyists, and more. HEiL has gained popularity over the years and solidified itself as leader in a crowded pack of microphones. If you are launching a podcast for your business or looking to upgrade your current set-up, this microphone may be right for you.
Shure SM7B around $400: Used by Joe Rogan and other big-name podcasters, the Shure SM7B is the cream of the crop when it comes to dynamic mics. It’s perfect for eliminating background noise, amplifying your voice, and getting the best audio quality money can buy. The best of the best is the Shure SM7B.
Just to reiterate, if you are new to podcasting it is best to keep your investment small until you know that you can consistently upload episodes. Also, dynamic microphones are your best tool in helping you sound like a professional podcast. It is your best friend in terms of helping you record better audio and editing your podcast because it is forgiving for background noises. With that said, let’s talk about some condenser microphones for some of you that are more experienced.
Condenser Microphones Under $100
USB Mics:
TONOR Microphone around $45: TONOR mics are becoming more and more popular with podcasters and YouTube enthusiasts. They are relatively simple to use and work with just about every platform. In addition, they are cheap and can be a great starting point for anyone looking to podcast with little money.
Samson Go Portable Microphone $50: As the name suggests, the Samson Go Mic is portable, lightweight and provides better sound quality than your computer. This may be the perfect microphone for those looking to podcast on the go or in multiple locations. It can also be attached to a mic stand should you need your work to be stationary. Consider this option if you plan on recording interviews or ambient noise.
Blue Snowball ICE around $70: The Blue brand has made a name for itself in the podcasting world by offering high-quality mics at affordable prices. Blue Snowball ICE offers a clear, crisp audio recording. It’s plug and play and comes with a headphone jack. However, it is missing the XLR port to future proof your set. If you are just starting out, you can’t go wrong with the Blue Snowball ICE.
Samson Meteor Microphone around $70: Samson mics appear several times on our list, but that’s because they make quality products. The Samson Meteor has a small form factor, but quality build. It can be muted, attached to a mic stand, and includes a headphone jack. It produces better audio than the Samson Go, but also has a much better build quality. You can use the Samson Meteor to record music as well as a podcast.
Blue Yeti Nano Mic $99: The Blue Yeti is widely popular among podcasters and YouTubers. The Nano version cuts some of the features while also cutting the price. You have a cardioid polar pattern and an omnidirectional polar pattern to sound all around you.
XLR Mics:
Rockville Studio/Recording Condenser Microphone $50: Rockville has become a favorite among many when it comes to recording audio at home. Setup is relatively simple and sounds come in nice and clear. You don’t have to break the bank for a studio mic. The Rockville Microphone can do it all, whether you want to podcast or record a song.
Samson C01 $65: It’s a Samson product so you know that you can expect quality. This is a great condenser microphone with excellent built-in quality. It does not come with the same features as the Samson Go or Samson Meteor Mic, but what it lacks in portability it makes up for in sound. The Samson C01 is perfect for recording studio-like productions on a budget. Multiple artists have used this mic to make some of today’s best hits.
Audio-Technica AT2020 $75: Again, Audio-Technica makes our list for the quality affordable sound. While this mic isn’t meant to travel multiple times, it earns a spot on our list for how good the quality is and the sheer amount of positive feedback we have seen for the mic. With over 2,000 reviews on Amazon, this microphone has proved it’s worth and then some. Many people who want to podcast together, but don’t have the budget for multiple mics select this one. They put it in the center of them and hit record. It’s not the perfect system, but it goes a long way. That’s how good this mic is.
MXL 990 around $75: The MXL 990 is your classic big diaphragm condenser microphone that can do it all. Use it to record multiple guests for a podcast or use it in your studio-like setting. This microphone is so versatile that it can be used for just about any of your recording needs.
Condenser Microphones Over $100
USB Microphones:
Audio-Technica ATR2500x-USB Microphone $120: One of the best sounds you can find at a relatively affordable price, the ATR2500x is great straight out the box. Audio-Technica has formed one of the best microphones that can be used for just about anything. This microphone has a cardioid pickup pattern and a headphone jack.
Blue Yeti starting at $130: If you have looked up any podcasting microphone list you will see the Blue Yeti on there. Why? Because it can pretty much do it all. It has a cardioid, omnidirectional, stereo, and figure 8 polar paterns. It produces a clear and crisp sound that can be used for high-quality productions and simple podcasts with you and your friends. It’s easy to set up and will improve your audio quality right out of the box.
XLR Microphones:
AKG P220 Vocal Condenser Microphone around $150: A condenser microphone that is specifically tuned for vocals? Heck Yes! This microphone is perfect for that studio set-up. It has a cardioid pickup pattern and excellent frequency selection. It includes a rugged carrying case that you can take with you anywhere and feel that your microphone is safe. If your room is treated for studio-like quality then check this mic out.
Voice Recorders:
Olympus Voice Recorder $60: Olympus is one of the leading brands in voice recorders. Intelligent Auto Mode can help automatically adjust your microphone levels depending on your environment. It makes podcasting on the go much easier. It records in MP3 and has 8GB of internal storage, while you can add an optional 32GB of SD storage. The voice recorder has two modes : simple and normal. Simple mode makes the process of recording simpler and easier for new beginners, while normal mode opens all the features of the voice recorder. If you’re looking for a budget option to start a podcast on the go, Olympus may be the right brand for you.
Zoom H1n Portable Recorder $100: The Zoom H1n recorder is the perfect recorder for most people. This recorder can function as your daily driver podcasting mic, as well as an on the go companion. It can record up to 24bit/96k, has playback features, one touch presets, a headphone jack, an SD card slot (up to 32 GB), a line in (for lavalier mics), and more. It has features to cut down background and help you set your audio levels for just about any situation. The Zoom H1n is in a class of its own.
Zoom H4n around $190: Last, but certainly not least, the Zoom H4n is perfect for the interview podcast. It comes with two XLR ports for microphones, four channel recording, a wide array of features, and cutting-edge technology. If you need a portable set-up but still want access to microphone usage, this is the perfect option for you. Consider this if you are a pro.
Mixer:
Mixers are not absolutely necessary when starting a podcast, especially if you are recording by yourself. Mixers usually have multiple inputs and make recording a podcast with multiple microphones much easier. That being said, they can become complicated with a wide variety of features.
You want a mixer that has some specific features. Mainly, it should offer phantom power, at least four XLR inputs, allows you to control gain and EQ, and can communicate with your computer.
There are some mixers that will not be able to plug directly into your computer. Unless you are a professional with audio equipment, avoid this type of set-up. It will be confusing and devote time away from creating content. If you just need two XLR inputs, try an audio interface. Here are some mixers to consider if you are in the market for one.
Pyle Professional Audio Mixer Sound Board Console
Behringer Q1202USB 12-Channel Mixer
Behringer Xenyx X2222USB Premium 22-Input 2/2-Bus Mixer
Audio Interface:
If you don’t need that many inputs, but still want to upgrade your audio, an audio interface is the way to go. First off, it can give you professional recordings and upgrade your overall sound. You can control gain, headphone levels, and connect XLR mics to your computer.
In some cases, you also get access to certain audio presets and software. We highly recommend looking into an audio interface once your podcast starts to gain traction. Although not necessary, it can provide a bump in quality, especially when dealing with expensive mics such as the Shure SM7B.
Here are some audio interfaces that can help you:
Focusrite Scarlett Solo (3rd Gen) USB Audio Interface
PreSonus AudioBox USB 96 2×2 USB Audio Interface
Rode AI-1 Single Channel USB Audio Interface
Focusrite Scarlett 18i8 (3rd Gen) USB Audio Interface
Recording Software:
You’re going to want to edit your podcast at some point. Eventually, you’ll mess up a name or want to include music in your show. That’s where recording software comes in. Having the right software can turn editing into a breeze, if you take the right route..
Think you need to spend large amounts of money on recording software? Think again! You have a ton of options, both free and paid. Each software comes with their own quirks and gimmicks.
Don’t be fooled by pricing, though. It’s best that you start on a free software and then switch to something else once you’ve figured out how to use a recording software.
Free software:
Both of these options can produce a high quality podcast.
Garageband: Included with every Macbook, Garageband is a stripped down version of Logic Pro Tools (Apple’s premiere editing software). This free software is great for beginners and their are thousands of tutorials on Youtube if you have any questions.
Audacity: Audacity is a free open-source software that has been used for newbie and professional podcasts. You can use it on both Mac and PC and it’s quite good at what it does. It’s simple, intuitive, and is getting constant updates to make the software better.
Paid software:
Alitu: Alitu takes the hassle out of actually editing your podcast and does it for you. There are some minor things you will do in the software, but it handles most of the workload. From there, you can share the podcast to your podcast host and publish.
Auphonic: Auphonic is a professional podcasting software that uses machine learning to analyze your podcast and edit it for you. You’ll still need to add in your intro and outro music, but it handles leveling and background noise for you.
Adobe Audition: Adobe Audition is not for the beginner. It is a recording software that is for those that know how to record. It can handle most things, whether recording live or editing afterwords. In addition, you’ll also get a ton of presets to play with that can make your production come alive.
Logic Pro X: Logic Pro X is a premier recording software that artists, podcasters,and musicians all use. It has produced more hits than you know, and is feature packed. If you want the best of the best for your podcast, Logic Pro X is your software.
Boom Arm or Desk Mic Stand
A boom arm and desk stand are what you use to hold your microphone close to your face while talking. Boom arms clip on the edge of your desk and can swivel around, making it ideal for DJ’s who have to touch a mixer or keyboard. They usually have a shock mount attachment as well, which protects the microphone from picking up noises while moving it.
Desk mic stands operate the same way, except they stand on your desk and take up more space. Unlike boom arms, desk mic stands don’t usually come with a shock mount. Having either one of these pieces of equipment will help you have to strain less when talking into the microphone.
Boom Arms under $35:
Neewer NB-35 Black Microphone Suspension Boom Scissor Arm Stand around $30
InnoGear Heavy Duty Microphone Stand around $25
Upgraded Adjustable Microphone Suspension Boom Scissor Arm Stand with Shock Mount
Desk mic stands around and below $35:
Gator Frameworks Short Weighted Base Microphone Stand around $35
InnoGear Desktop Microphone Stand, Upgraded Adjustable Table Mic Stand around $15
On-Stage DS7200B Adjustable Desktop Microphone Stand
Headphones
Another piece of gear you’ll need to start a podcast is some headphones. That way you will hear yourself in real time while recording your podcast. In addition, you can use them while editing to cut out some background noise.
You should look for headphones that won’t bleed audio outside of the ear cuffs, and, of course, provide good sound quality. Bleeding audio can be picked up by your microphone, which creates an echo effect that you will have to deal with later in postproduction.
Some headphone choices that most people recommend are:
Audio-Technica ATH-M30x Professional Studio Monitor Headphones $70: The M30x headphones from Audio-Technica are the gold standard for anyone just starting out. They are lightweight, don’t leak sound, and are quite comfortable, even after long periods of use. If you buy these headphones, it will be a while before you need an upgrade.
OneOdio DJ Stereo Monitor Headphones $35: OneOdio is making some great headphones at affordable prices. With over 5,000 reviews on Amazon and 4.5 rating, you can expect quality. The headphones also fold up nicely to make travel easy.
Amplifier
While not entirely necessary, an amplifier can help your production value if you have multiple guests. Essentially, an amplifier will allow each person to have their own headphones and volume control. Everyone has their own channel and can turn up or down the volume in their headphones.
You can adjust volume anytime throughout the podcast. This will take your production to the next level and make sure you get the best sound.
If you want to know more check out this review for the best integrated amplifiers that are not complex for the average user.
Pop filter
Pop filters are wire mesh screens that you put in front of your microphone to prevent plosives. “Plosives” are air and spit that is pushed from your mouth when you make harsh “P” or “T” sounds, and when you yell.
These handy little additions can make your podcast sound smoother and your editing a whole lot easier. They usually cost a couple of bucks and attach to your microphone stand via a clip-on.
Aokeo Professional Microphone Pop Filter $15
Recording your First Episode
First, make sure that you are in a quiet room with little noise from an A/C unit, bathroom, or window facing the room. Try to pick a room with a bed in it with blankets, or filled with all types of items.
Having multiple “soft” items in a room will help dampen the echo that happens in a wide barren room. Ideally, a closet full of clothes will work best. Not everyone wants to do that, though, so consider putting a blanket or two on the walls.
Second, if you have not already started planning out what you are going to say during your podcast, and you don’t want to write a full-on script of what you plan to say, a general outline of topics and research we’ll help you.
It will give you structure instead of making you waddle your way through crafting your podcast. Leave breaks for music or any sound effects you may want to add. Your co-host should do the same as well.
Third, set up your equipment. Make sure you are speaking into the side of the mic that will be capturing your voice. Try to position your computer away from your microphone to avoid background noise of your computer.
Fourth, do a mic check and make sure your microphone, mixer, or audio interface is selected for your computer. Speak into your mic saying “test 1,2, test 1,2.” Once you have set your gain levels and volume correctly you should be set to go!
Fifth, hit record and watch the magic unfold! Or rather, realize that this wasn’t as easy as you thought it would be since you haven’t had a lot of time recording on your microphone. Truthfully, your first attempt at a podcast might not sound so great.
Sixth, after recording, play back your audio and write down places where you can improve, where to cut content, and some of your strengths. Then get to editing on your recording software!
Practice. Practice. Practice. No one ever jumped on a podcast the first time and absolutely killed it. Every pro started as a newbie like you. Your skill will improve over time!
Where to Host Your Podcast and How to Prepare for Launch
Website vs. No Website, and what the heck is an Audio Host?
So, you’ve recorded the first couple of episodes of your podcast. You’ve edited them in your software. Now you’re ready to upload to iTunes, except, you can’t actually upload your podcast straight to iTunes or Spotify directly from your computer. iTunes and other podcasting apps need an RSS feed submitted to them.
So what the heck is an RSS feed?
According to Tyler Lacom at Digital Trends, an RSS feed is:
“RSS stands for “really simple syndication,” or, depending on who you ask, “rich site summary.” At its heart, RSS is just simple text files with basic updated information—news pieces, articles, that sort of thing. That stripped-down content is usually plugged into what is called a “feed reader” or an interface that quickly converts the RSS text files into a stream of the latest updates from around the web. As internet content became more complex, so did RSS files, which quickly adopted images, video, and more, but still in a stripped-down format for easier loading and compatibility across all feed readers. Readers usually automatically update, so that they deliver the newest content right to your device. Basically, this approach allows internet users to create their own online feeds filled with custom updates from the sites that they like to visit regularly.”
iTunes and other platforms act as feed readers. They automatically syndicate your episodes based on that RSS feed and update users with the latest content. iTunes and others pull from that RSS feed to distribute your episodes for streaming and downloading.
Spotify, iTunes and other major podcast players do not house your podcast on their site. Instead they act as an interface from which users can browse when you start a podcast in 2020.
The best way to get an RSS feed is to either have a website or to have a podcast audio hosting website. However, you don’t want to use your website to house your podcasts as that can cause your website to run slow and be sluggish. For the best method, opt for a podcasting audio host.
Audio Host Platforms
Let’s establish upfront, you do want a website for your podcast. Through your website you can sell products, interact with your audience, write blogs, etc.
However, it is not absolutely necessary to launch a podcast and grow an audience on a website. A podcasting audio host is all you need, and fairly successful podcasts just use a podcasting audio host. The platform you choose should be easy to use, make it easy to submit your podcast, give detailed statistics, and have some cool features.
Let’s run down a list of some of the most popular podcasting audio hosting sites to use.
Anchor: Anchor touts itself as an all-in-one platform where you can upload your podcast, edit them slightly, and monetize. You don’t have to have a minimum subscriber count to start monetizing, and you get instant access to analytics. It is also 100% free audio hosting with one-click distribution of your podcast to all streaming platforms. Listeners will also be able to support you with the Listener’s Support Button. Anchor is a great starting point for anyone looking to cut costs and automatically start monetizing their episodes.
Buzzsprout: Buzzsprout is one of the leading brands in podcast hosting and it’s no secret why. Their simple interface and stats make it easy for you to take control of your podcast. You’ll get a podcast website, instant access to every major podcast directory to upload to, analytics that are broken down by country, and tools to help share your podcast. Hosting is free for days and then you will have to pay at least $12 a month for 3 hours worth of upload time. You can also pay .25 a minute to have your podcast transcribed.
Libsyn: Although not as popular anymore, Libsyn is a mainstay of the industry and houses some of the world’s most famous podcasts. You get a simple platform to work with that provides deep analytics for your podcast. You can publish in all podcasting directories, sign up for monetization options, and get a custom smartphone app. If you are looking for a podcast audio hosting service that has proven itself time and time again, Libsyn should be your go-to.
Podbean: Like Buzzsprout and Libsyn, Podbean will give you some very in-depth statistics about your podcast. Users like Podbean for the ease of use, unlimited hosting, mobile podcast publishing, monetization features, and much more. Also, you can easily set up a patron page for supporters. Not only that, but this is one of the few platforms that will allow you to live stream shows should you want to. It’s free to start using, but after a month you will be charged $9 a month.
Megaphone: Megaphone is branding itself as a place for podcasters who want to focus on monetizing their content and back catalogue. Although, not as intuitive as some other recommendations, Megaphone has most of the features you expect of an audio host. If you are looking to turn your podcast into a business, consider Megaphone. You’ll get access to forecasting data, business insights, and audience targeting. However, pricing is unique to the podcaster. Consider switching over to megaphone once you have an audience.
This are not the only options you have, but the vast majority of podcasters choose these platforms.
Why You Still Need a Website for Your Podcast
When you start a podcast you may not have a website. However, as you grow you’ll want the website for multiple reasons. A website allows you to:
- Build an email list
- Sell products
- Launch a blog
- Receive fan feedback
- Have a home for your podcast
- Create unique content
- Study more analytics
- Update your fans on the status of your podcast
- Create branding for your podcast
- Use Calls-To-Actions
- House archives of old episodes
- Get SEO results when you use keyphrases in your show notes
- Act a sales funnel
- Have total control over your content!
If you are serious about monetizing your podcast and growing an audience then you need a website. How exactly do you go about doing that?
Website Hosts to Start a Podcast within 2020
In order to start a website for your podcast you need a website host. A website host is a company that houses your website on their servers. Basically, they make sure your website can be found on the internet when searching your URL. With this website host you will also need to purchase a domain name.
A domain name is the actual name of your website. Purchasing a domain name is fairly simple and you can buy both hosting and your domain at the same time, depending on the website hosting platform you choose.
Important for beginners, the website hosting platform you choose should use WordPress. WordPress is an open source management system to design and manage your website.
In simple terms, it is the interface you use to design your website and operate it. Why WordPress though? WordPress is the most dominant platform in the world. Companies such as BBC America, Variety, Walt Disney Company, TechCrunch, The New York Times, NASA, The New Yorker, Sony Playstation, and millions more use it! It’s free to use; you’ll just need to pay for web hosting and a domain name.
The best and most popular DIY option for podcasters is BlueHost.
With Bluehost you get:
Free Domain Name for 1st Year
1-Click WordPress Install
24/7 Support
Starting as low as $3.99 a month, Bluehost gives you all the tools to start and launch your website with success. You will get an actual domain name such as www.iamcool.com, not a domain like iamcool.wordpress.com. That is key for your audience to find you, and for Google to pull up your website when someone searches for you. You can also install hundreds of plugins to get the best experience for your users.
If you would like a step-by-step guide on how to set up Bluehost, WordPress, and plugins check out our guide on how to start a blog website in 2020.
If you want this all done for you click here to contact us.
Cover Art
Lastly, you will need either to purchase or make your cover art. According to Ana Gotter on Snappa:
“The podcast cover art dimensions are 3000 x 3000 pixels, which is an 1:1 aspect ratio. In general, you should be using JPG or PNG files and if you’re creating podcast cover art, it should have a minimum of 1400 x 1400 pixels. You also need to be utilizing RGB color space for best results.”
If you don’t have photoshop or InDesign skills, don’t worry. You can buy cover art on sites like Fiverr for as little as $5. Trust us though; spend a little extra and get a quality cover art image. We aren’t supposed to judge a book by its cover, but we absolutely do.
A podcast cover art is the first thing a potential listener should see. If you aren’t rich and famous, then it’s best to focus on an engaging design that will intrigue listeners. 99 designs can be a good platform to buy podcast cover art as well.
Set up Social Media when You Start a Podcast
Before launching your podcast make sure to secure social media accounts on the platform you plan to use the most. Some may argue that you need to be on all social media platforms starting out.
While that may sound like good advice in theory, it doesn’t exactly always work the best. Instagram, Twitter, and Facebook all have different demographics, different ways of advertising, and different ways to engage with your audience. Picking a main platform to reach your audience is key to growth. Make no mistake though, have a social media presence is critical to start a podcast in 2020.
If you plan on conducting polls often and interacting with fans, Twitter may be better for you. If you are doing a video podcast and want to upload short clips, then Instagram may be your best bet with their story feature.
Plan on joining some community groups and being an involved member, Facebook is a great place to start. Look at every platform and every tool at your disposal. That isn’t to say you should stay static, but know your strengths and weaknesses. When you are ready, then start launching into more areas.
How to Submit Your Podcast to iTunes and What to Do after
Now that you have recorded a couple of podcasts, feel comfortable on the mic, edited your episodes, chose an audio hosting platform, have cover art, and established your social media presences, you are ready to upload your podcast to iTunes, Spotify, and other platforms.
You have an exciting feeling in your stomach and the anticipation that comes with releasing something creative into the world. You’re almost there! For this example, we are going to be acting as if you are uploading an episode to the podcasting host Buzzsprout.
Submitting to Your Podcast to iTunes
First, upload your episodes to Buzzsprout’s website, then fill in the information about your show. Upload cover art and add podcast details and notes. You will upload show notes each episode, but your static information will be done under Podcast Settings (i.e. podcast summary, cover art, category etc.)
Second, if you do not have an Apple ID you will need to create one. If you have one, you can then submit your podcast.
Third, on Buzzsprout you will click the Directories button, choose Apple Podcasts, and click submit to Apple Podcasts. It will then take you to a website in which you can submit your RSS feed to Apple Podcasts. For those of you not using Buzzsprout it is https://itunesconnect.apple.com/login. Login, and type in and upload your podcast information to Apple Podcasts. If you partner with Buzzsprout it will do this for you.
Fourth, in the URL empty box, place your RSS feed. Click verify, which will cause Apple to double check the RSS feed, making sure that it is working properly.
Fifth, hit submit and you are done! Apple will review the podcast and in a couple of days you will get an email stating that your podcast has been accepted. It will then be accepted into the directory and your episodes will appear in the Apple Podcasts App!
Here is a video tutorial for you as well
Submitting Your Podcast to Spotify
If you are using Buzzsprout, all you have to do is go to Directories on your podcast dashboard. Click on Spotify, review your information and hit submit. You’re done and your podcast will be loaded if you are not!
If not with Buzzsprout:
Repeat step one of iTunes. You want to make sure your podcast settings has all the correct information and you have uploaded an episode.
Second, you will then go to https://podcasters.spotify.com/. Click Get Started. Then you will type in your Spotify account information. If you do not have Spotify account information, you can set one up from this page.
Third, you will be taken to a Dashboard page in which you will be able to submit your podcast. Click Get Started or Add New Podcast. Either way, it will let you upload a new podcast. It will then take you to a place where you can submit your RSS feed.
Fourth, copy that RSS feed from your audio podcast host and paste onto the Spotify page. Your information should automatically start to pull up.
Fifth, Spotify will then verify your email that is attached to your podcast by sending an email with a code in it. You will then type that code in and hit next or continue.
Sixth, you will then be taken to a page in which to give some information about your podcast and choose your category. You will review this information when you press Next. You will then submit your podcast! Your podcast will be in the directory and you will be notified when your episodes are loaded onto Spotify!
Here is a video tutorial for you as well.
If you have a website, make sure to post on there as well!
Spread the Good News!
You have officially launched your podcast! Awesome! Time to get some listeners! Don’t just spam your podcast over and over. Try making a list of specific people on your friend’s list to share the podcast with.
Also, when you post your first episode on social media try to write engaging headlines about the episode or who is involved. Really sell yourself and your work, and position yourself as a content provider. What would make a potential listener’s ears perk up?
Start a podcast in 2020 off right with having a couple of marketing tactics to get noticed.
Ask for Reviews From Your Family and Friends
One of the best ways to get noticed early on is to get on the “New and Noteworthy” lists in your specific category. The best way to do that is to get reviews and downloads right away. You don’t need many reviews to start gaining traction. Have at least ten people in mind to review your podcast, giving it positive scores. This can help boost your chances of getting on the New and Noteworthy list.
Figure out what you can do better
Listeners like growth. It doesn’t matter if it’s voice, equipment, storytelling, guest interviews, or overall well-being. Constantly getting better is going to make other people take notice of your hard work and subscribe.
Also, getting better each time you record will help you stay up to date with current trends and show that you listen to audio feedback. Pick one thing after each episode that you can focus on to improve. It can be minor or huge, but what matters is that you are making a better show for your listeners.
Remember, word of mouth is still king, even in the podcasting world.
Helpful Links to start a podcast in 2020
Finally, here are a couple of videos, articles, and links to help you on your journey of becoming a podcaster. Each one deals with a different aspect of podcasting and can be very useful. All of them give advice on how to start a podcast.
If you like this article, please share on social media or send it to a friend. Subscribe to Dock Line Magazine and receive content like this in your email.
How to Start a Business or Podcast From Scratch | Tim Ferriss
How to Record and Edit a Podcast in Audacity (Complete Tutorial)
The Truth About Running a Successful Online Business
6 Ways to Grow Your Podcast Audience with SEO
Growing Your Podcast Audience: How Long Does it Take?
How To Start A Podcast: A Complete Step-By-Step Tutorial